One of the best things you can do to make scoring a race easier and faster (aside from using MotoTally of course!), is to
organize your stuff and streamline your operation! A dedicated scoring trailer can go a LONG way toward making your job
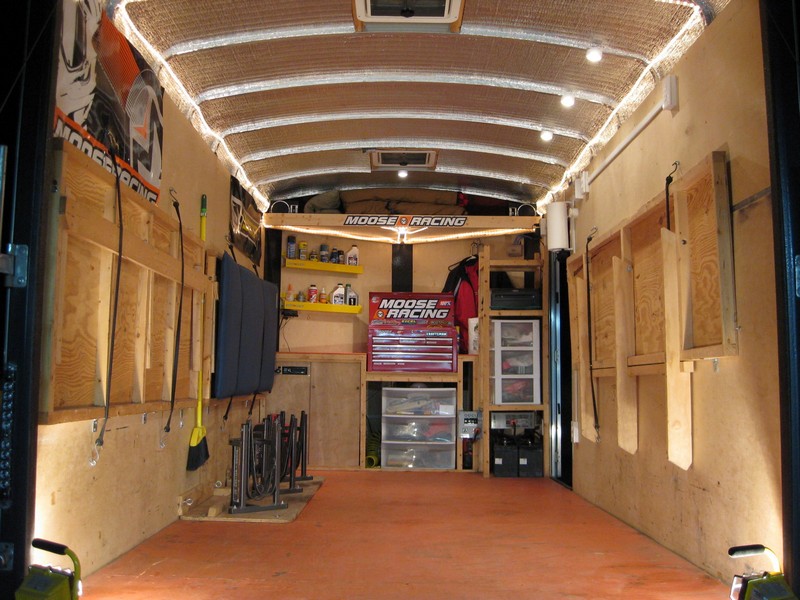
easier. The pictures that follow are of the Black Jack Enduro Circuit's Scoring Trailer. I started with an empty 14' x 7'
V-Nose cargo trailer from H & H Trailers, and turned it into
something that made scoring races MUCH easier. I don't do trailer conversions, but maybe this page will give you ideas for
your setup!
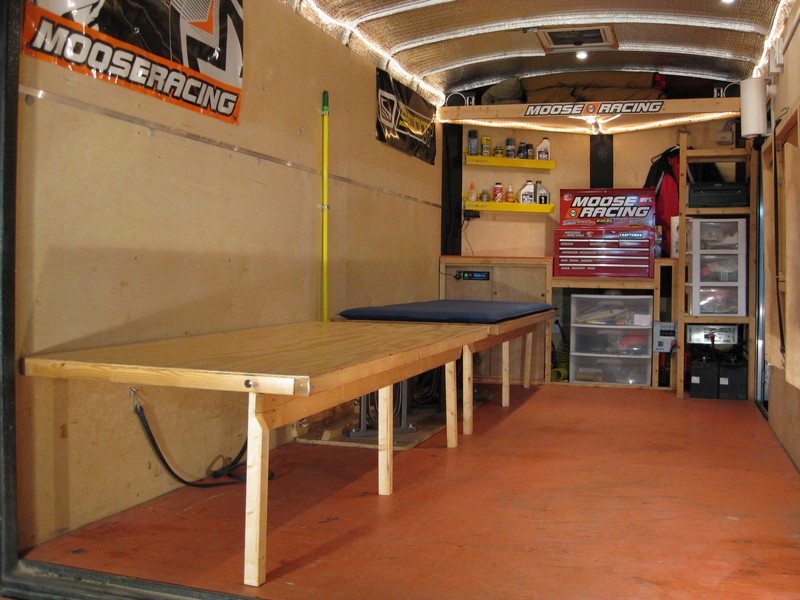
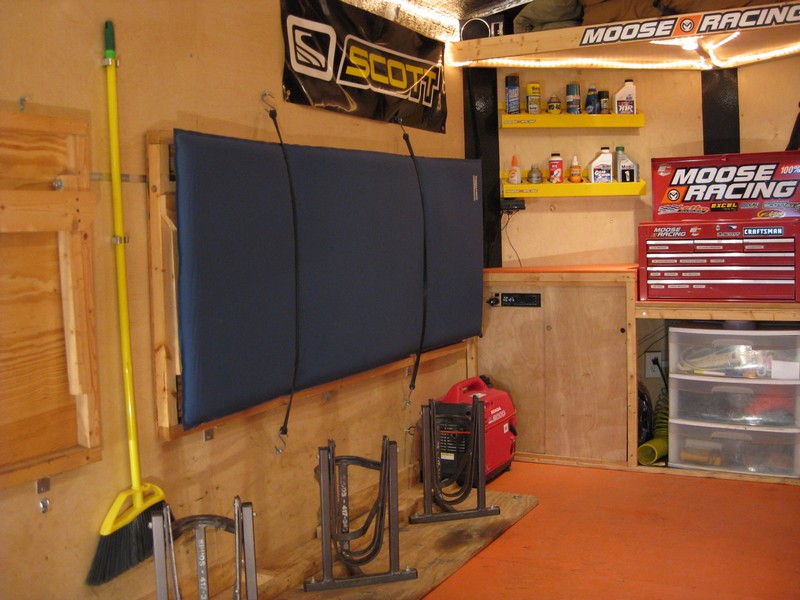
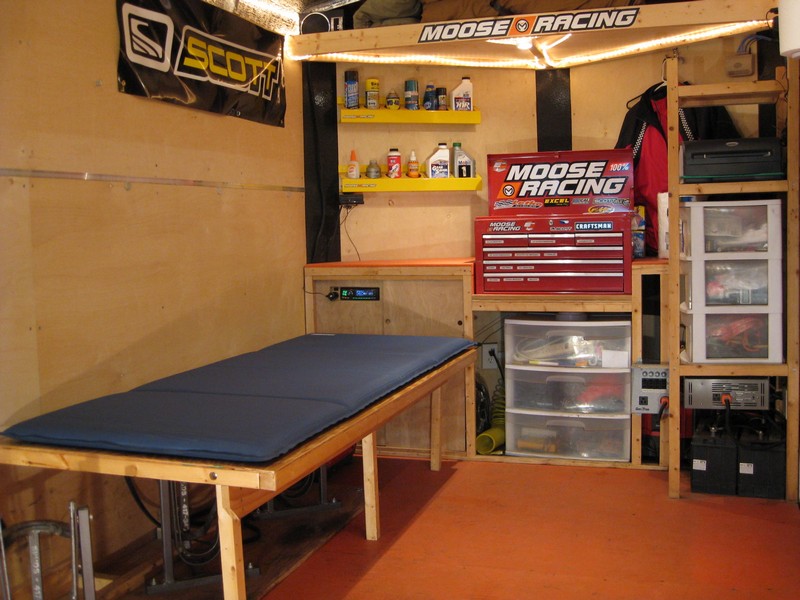
On the right side of the trailer, I have a scoring table. I used 2x2s for the frame, 3/8" plywood for the surface, and 1x4s
for the legs.
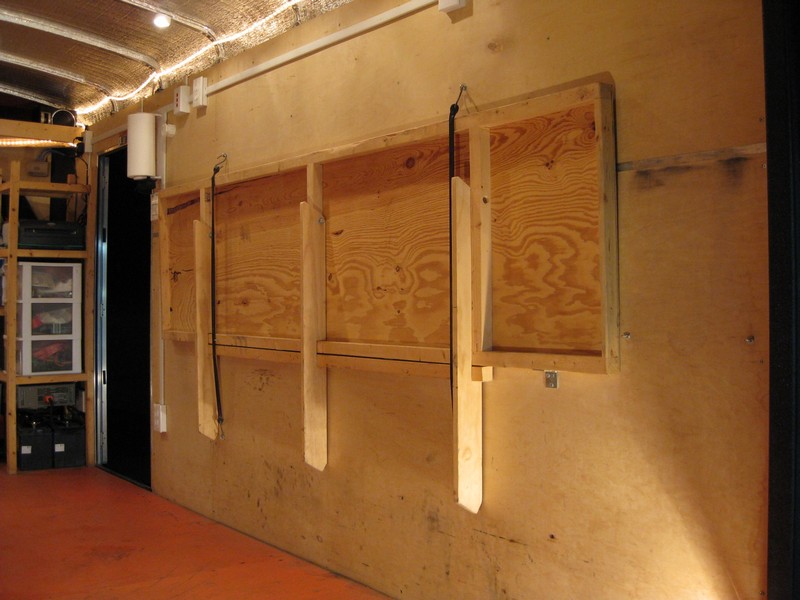
On the left side I have two bed bunks. I used 2x2s for the frame and legs, and 3/8" plywood for the surface. I also used
1x4s to keep the legs syncronized for ease of deployment.
Both bunks down. I put them just far enough off the ground to clear the bike shoes. They are only 6' 3" long as that is
about all I could fit in this trailer. Folks much over 6' will want something longer. 2x2 frame is fine for humans of average
size. Folks much over 250lbs would probably want something beefier than a 2x2 frame.
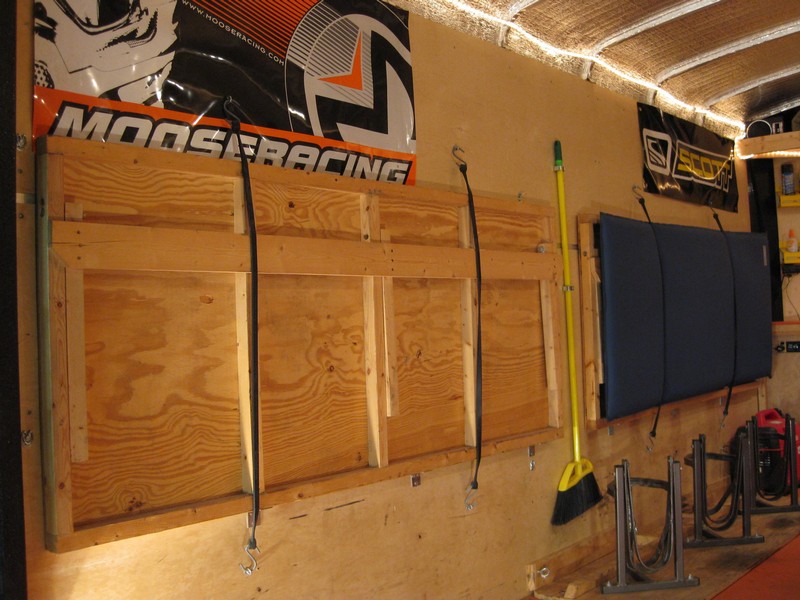
No built in padding means the bunks fold up nicely to the wall and take up very little space, but that doesn't make them
very comfortable for their intended purpose.
Therma-Rest padding stores nicely and provides a nice buffer between body parts and the hard wood. Air mattresses work fine
too, I just find the Therma-Rest quicker and easier.
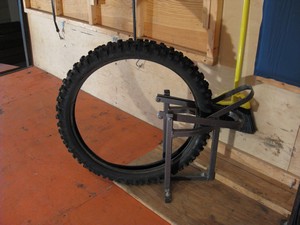
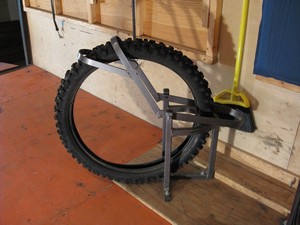
I mounted three SpudBilt Bike Shoes on a 3/4" piece of plywood so
it would be removable. Then I made a tounge 'n' groove interface to keep the shoe board held down. One pin on each corner
keeps the board interfaced with the hold down groove on the wall. The weight of the bike(s) is enough to hold it all down.
Angled at 45 degrees and placed against the wall means they are automatically out of the way. NO WORRIES about bikes coming
loose in this trailer!
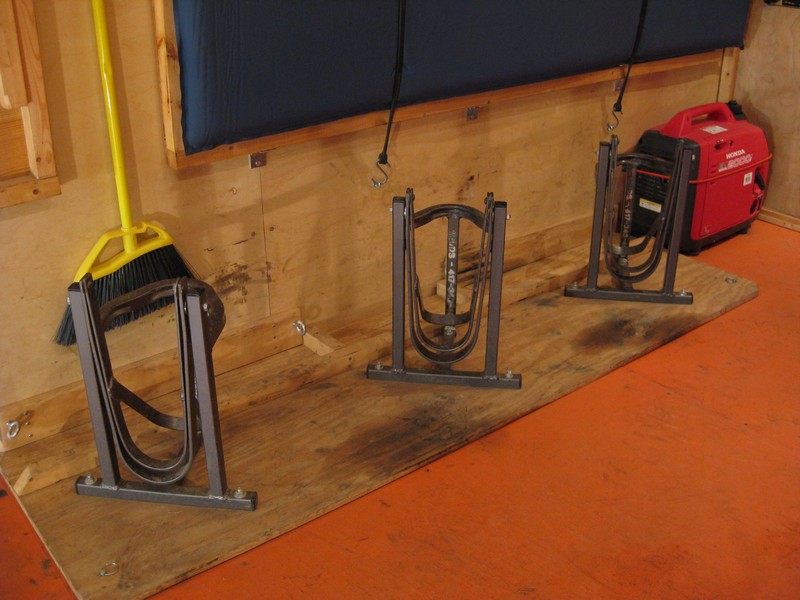
Spud's Bike Shoes RULE!
|
Step 1: Insert Wheel
|
Step 2: Adjust Cam
|
Step 3: Lock Cam

|
I'm using a Honda EU2000i generator for juice. Obviously you don't RUN it here, just stow it here. It is super quiet, sips
fuel, and provides 120v AC with a pure sine wave, which is very important for sensitive electronic equipment like your laptops
and printers (critical for laser printers). I got mine from Wise Sales
for $950 shipped to my door.

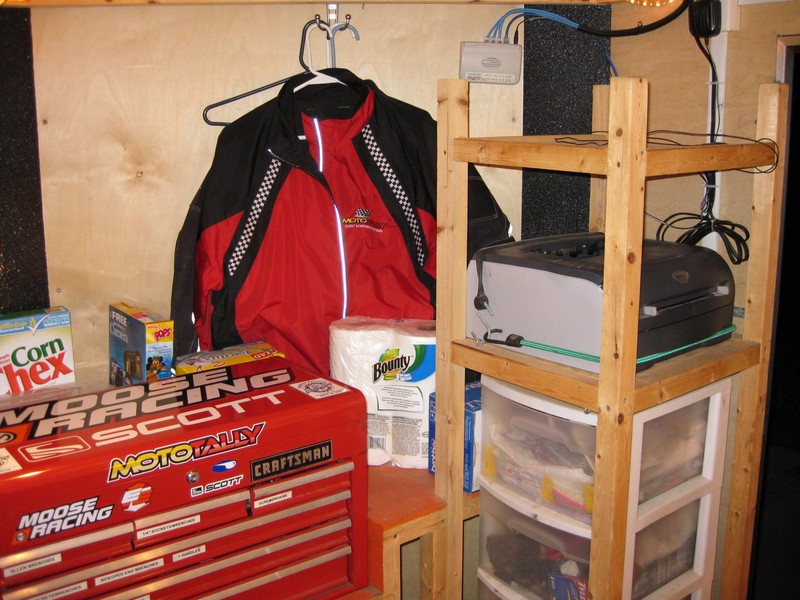
Here is a closer up shot of the frontal area. The V-Nose made it nice to get all this stuff up there, effectively adding
on about 3' to the length of the trailer. Note upper shelf makes a great place to stow bedding and soft items.
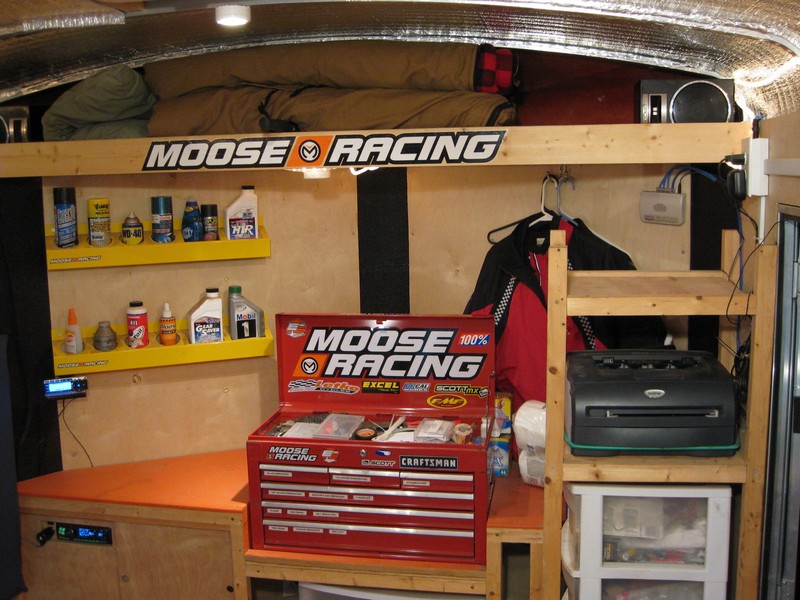
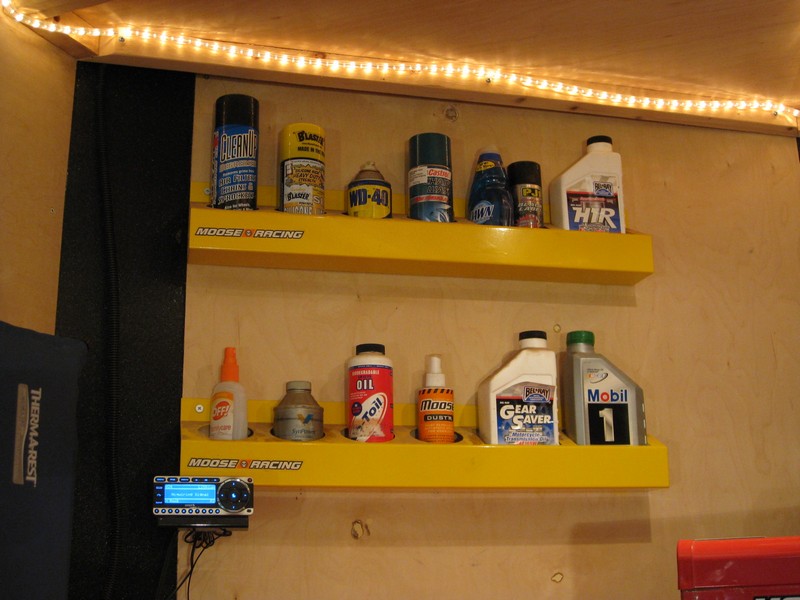
A couple of can racks from Moose Racing make organizing your oils
and lubes and stuff cake.
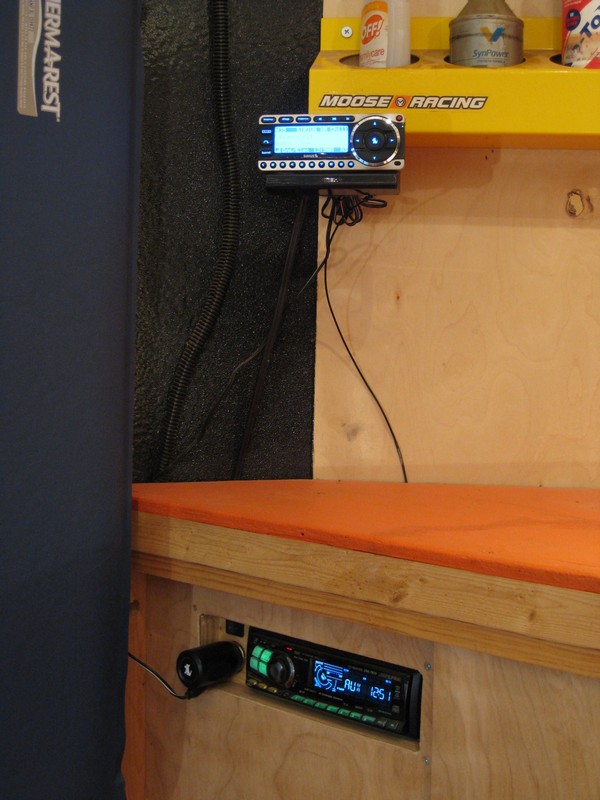
By upgrading the stereo in my truck, this slightly used Alpine unit all of the sudden magically needed a home. A little
fabrication created the perfect place to put it. Switch powers it on/off (like your ignition key normally does), and a 12v
power receptacle powers the Sirius satellite radio (or charges the iPod or cell phone). Tunes help make job seem more fun.
Some thin pieces of trim nailed and glued into the proper place make a nice rail for the door to slide on. Back in there
I keep a small 2 gal air compressor (great for cleaning dust out of electronics and airing up matresses or tires). I also
have a small jack and colapsable star wrench, jumper cables, some DVDs, and a fan or portable heater.
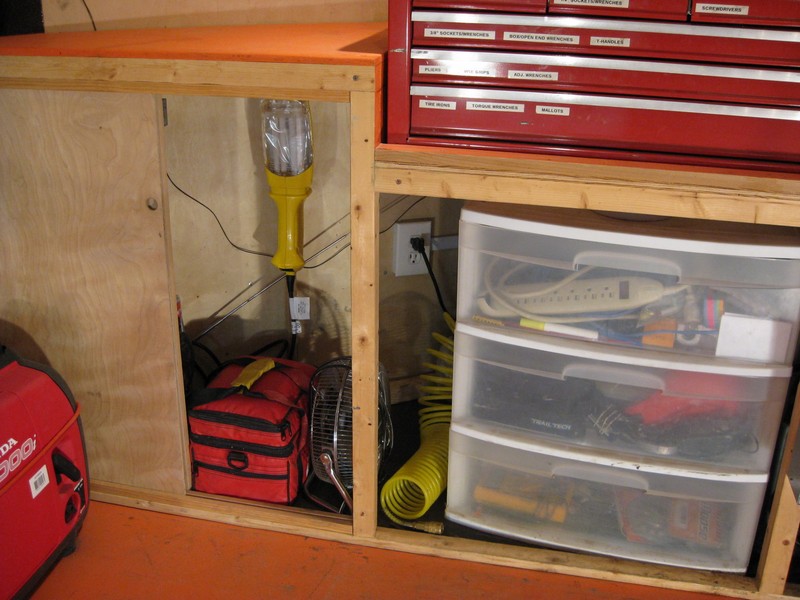
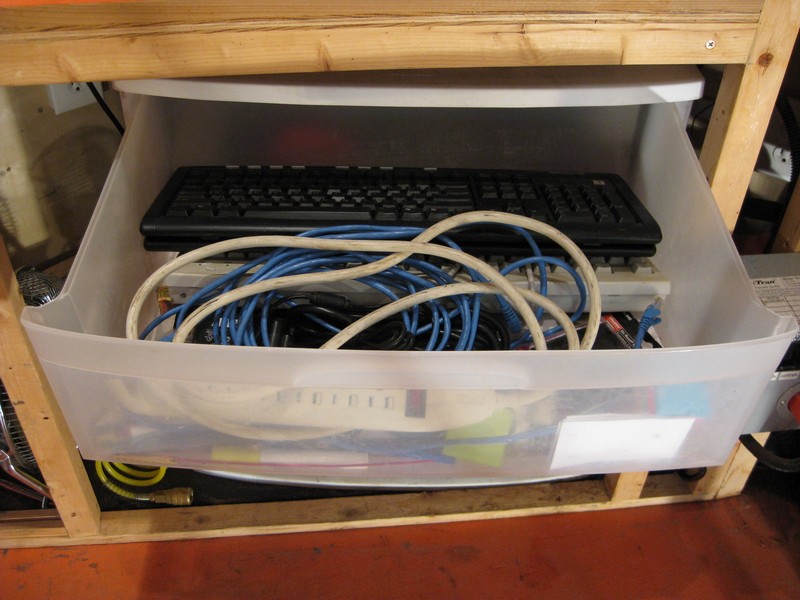
Some plastic drawers from WalMart make for cheap storage. Here I stow external keyboards/mice for the laptops (makes data
entry way easier), Cat-5 ethernet cables, power strips, and other misc. stuff.
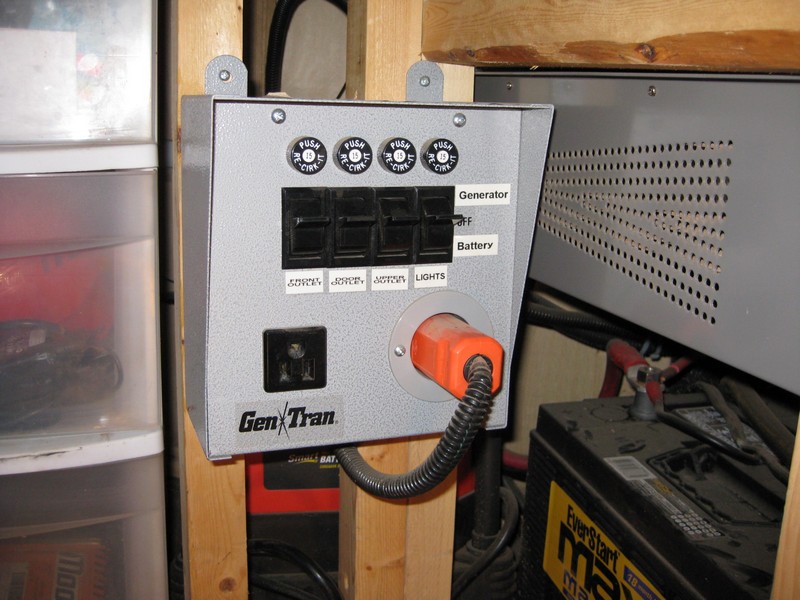
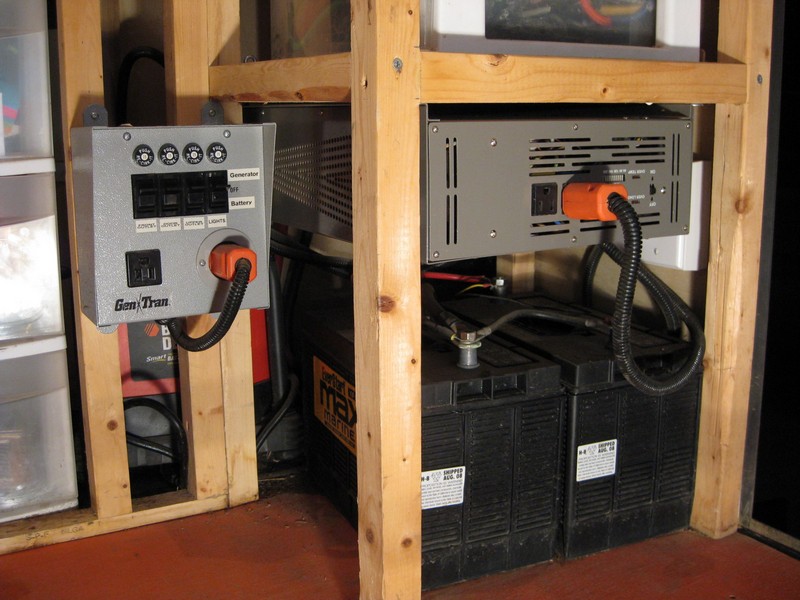
This manual power transfer switch from GenTran is a must
have. It lets me switch various power outlets from a generator (or line) source, to a battery powered inverter source, to
off. I got it from http://www.nooutage.com/ for only $70. Not pictured
is a weatherproof power inlet that I put at the front of the trailer. I just flip the lid open and plug in the generator
or line power. I'm all powered up and ready to go and don't have to run a cord inside or worry about closing a door on it.
The heart of the battery power source. The GenTran power transfer switch, two deep cycle marine batteries (purchased at
WalMart) wired in parallel, and a Aims 1500 watt pure sine wave inverter ($430 shipped) from http://www.invertersRus.com/. This setup lets me run laptops and lights for an entire day without
the need for a generator. Typically what I do is, run the laptops off of the inverter (for uninterrupted power in the event
the generator runs out of gas before I catch it), and everything else off the generator. I also have the biggest (Black
& Decker) battery charger that you can buy at WalMart back there, and when plugged into line or generator power, I can charge
the batteries at 40 amps. I usually just leave them charging while in use and have the generator running.
I have the ethernet hub/switch and printer permanantly wired and mounted so I don't ever have to setup/tear down these two
cable hungry items. The printer is a Brother 2040N monochrome network laser printer. All laptops can print directly to it
over the network. This printer has been used for 2 full years of scoring so far. I have had zero issues with it, other than
feeding it paper all the time and an occasional toner cartridge (which to me is amazing considering the non-temperature
controlled environment, humidity that is all over the chart, and the amazing amount of DUST that makes its way into things
in this trailer). Laser printers print MUCH MUCH faster than inkjets, but they are also VERY power hungry. This one pegs
out my inverter when I'm running on batteries, and it works my generator pretty hard too. I usually switch over to generator
power before any heavy printing. I got this printer at http://www.newegg.com/
for around $100. At that price, they are practically disposable.
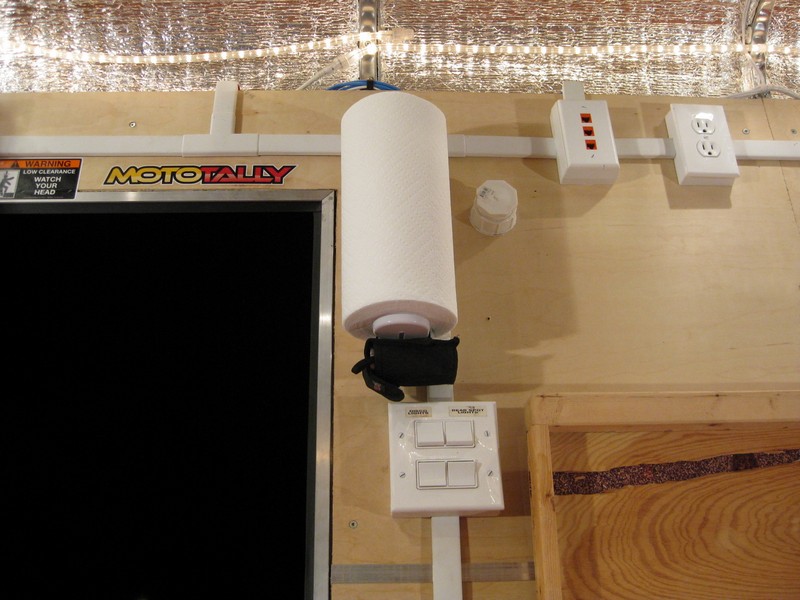
Lots of attention to detail on the electrical wiring. I purchased all these surface mount conduits and outlets at Home Depot.
Makes for nice clean wiring, and best of all, it is there ready to go. I don't have to pull out extension cords and be tripping
over them all weekend. Note Cat-5 wired in so laptops can plug in easy. That plug looking thingy to the right of the paper
towel holder is just a PVC fitting with a cap screwed into it. I drilled a hole through the wall of the trailer and siliconed
the fitting in there. This way if I need to run any type of wiring outside, I can run it through this hole and still be
able to close the door.
Light switches are wired up to the lights so I have full control over what is on and off. I used rope lights and under cabinet
halogens for lighting (got both types at Home Depot for cheap). They do a pretty decent job of lighting the workplace up
and eliminating shadows. The reflective surface near the rope lights helps a bunch.
That aluminum foil looking stuff on the ceiling is insulation. It is basically 1/4" thick closed cell foam sandwiched between
a heavy foil. It is called Prodex and claimes a rating of R19. I got a 4' x 50' roll for $120 from Barn World, which was almost twice as much as I needed to do this 7' x 14' trailer. I used 3M double
sided foam tape and foil tape to install it. The insulation made a HUGE difference on keeping the trailer cool in the summer
when the sun is beating down, and does wonders for keeping the heat in when it's cold outside.
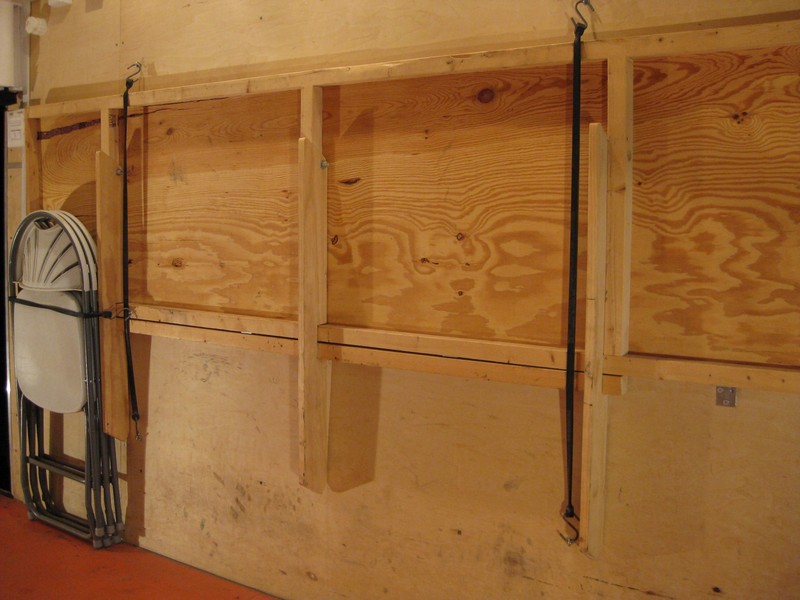
Here is the table and chairs all stowed. I got the chairs for cheap at Ace Hardware. Rubber bungies hold things in place.
When I had something solid to screw into I used standard "wood screw" eyelets. The plywood walls are very thin so I didn't
trust the standard eyelets. It took a while to find them, but I used special "machine screw" expansion nuts that are designed
for this type of application. You drill a hole, stick em in there, then use a special screw to expand the back side up against
the plywood, and you have a solid mount for your eyelets.
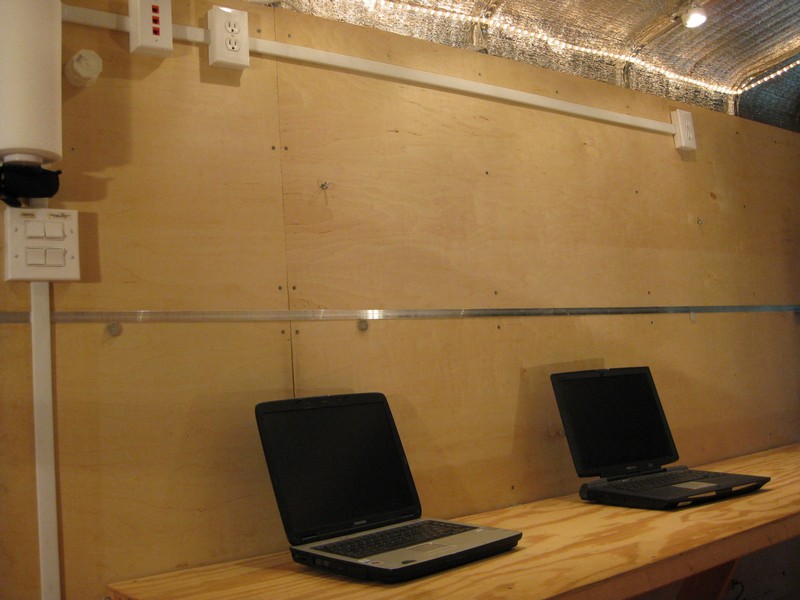
The table is plenty long for three laptops, and deep enough to place an external keyboard in front of the laptops. Cat-5
receptacles and power outlets make it easy to plug everything in.
Another shot of the table down and ready to go. The table legs automatically fall into place when you lower the table, and
do a reasonably good job of staying out of the way of your knees and feet.
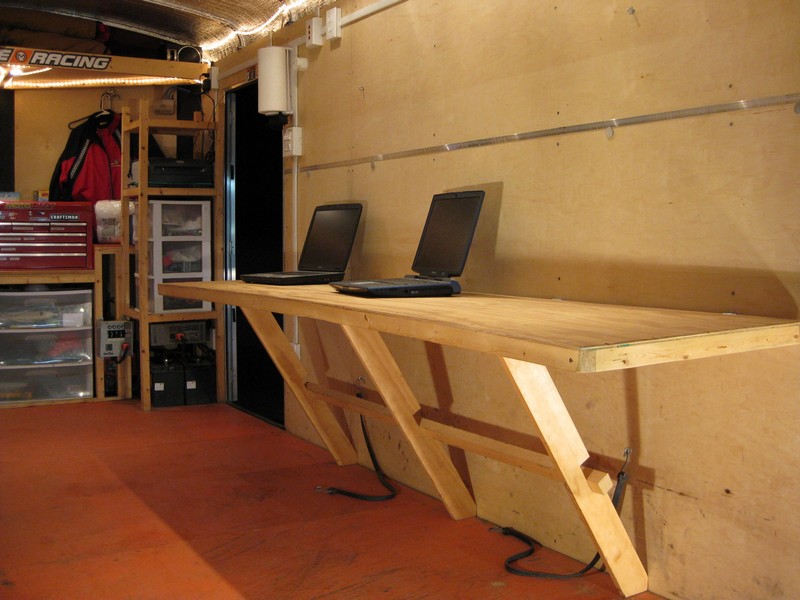
Underside of the table. Legs were cut to angle, notched, and hinged with lag bolts and backed with double nuts. I had to
dig into the memory banks to remember some high school trigonometry and used the assistance of a calculator to figure the
angles. Note that this thing probably isn't sturdy enough to sleep on, but it works just fine as a table.

I hope you have found some useful and enlightening information in here. I've scored enough races to really appreciate ease
of setup, teardown, and general comfort and shelter from the elements while scoring! If you have any ideas, comments, suggestions,
or questions, don't hesitate to shoot me an email!